My next step was to begin on the body. I had no knowledge or skill in this, shop
so had a friend, Dave Dante, come and teach me the basics. With his help I knew enough to get started. There were several open times during this work when I was able to also complete a few other tasks. This includes cleaning and waxing much of the visible sheet metal in the engine compartment, putting bulb seal and weatherstripping on some of the chassis and panels, trimming some excess panel edges, removing unneeded electrical wiring and investigating attaching heater and defroster hoses.

The other major activity was to drill holes for the windshield wiper mounts. Fortunately, I investigated this prior to beginning the work. I found out that I had outdated instructions for the installation. The new instructions required moving the position of the drilling guide tool. I put this in the correct position for the Mark IV, and drilled the wiper mechanism mount holes on each side.


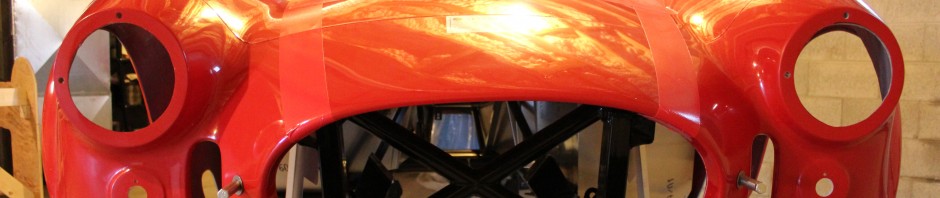
Prior to doing any of the body work, I first wanted to clean the outer surface of the body and door, trunk lid and hood panels to get rid of remnant mold release chemicals. I went over it with a degreaser and with comet cleanser.Â
Next I began working on the seams on the body. This required that I first grind the seams to eliminate excess material. I ground the seams just below the surface of the panels. Along the seams, this created a groove or channel roughly 1/4 – 1/2″ wide and 1/16 – 1/8″ deep. Next I had to build this back up to match the panels on either side and the other contours of the body. I filled all the channels with Rage Gold filler. After it dried I began sanding the excess material. Most of this was done with 80 grit sandpaper and a sanding block. Some of the very sharp curves were done with just the sandpaper.


After the first sanding was complete, I had my work inspected. As I expected, Dave showed me some places that I needed to fill and or sand again where it was too high or too low or not the proper contour. He said some places might need multiple steps. I re-filled and sanded all the seams a second time. This came out much better, but I did still find quite a few spots I wanted to do again.  These were filled and sanded, and the whole car checked again. All told, I went over various sections of the seams up to 6 times to get the shaping right. This included along door openings, the fuel filler opening and some of the rolled edges along the cockpit by the dash area and in the front opening of the body. I also filled the entire underside of the hood scoop and sanded it several times. This piece was essentially just fiberglas, and as it will be visible with the hood open, it needs a finished appearance. Ultimately, I got this done to the best of my ability. Any final work prior to primer will be done by Dave.

Once the work wit the filler was done, I needed to sand all the gelcoat surfaces of the body and the door, trunk and hood panels. I did this using 180 grit sandpaper as the objective was to simply clean off all the shiny surface of the gelcoat. That has all been completed, all pieces have been cleaned with compressed air, and now I am ready to mount the body on the chassis and start fitting the doors, trunk lid and hood in their respective openings.


 More photos of this work can be seen in the Gallery.
I’m at the point now that I can begin body work. However there are a few items I decided to finish now since they mostly need to be done while the body is off. I can do them later but I also need help with the body install so this will fill in time.
I need to connect the hoses to the heater/defroster. After a lot of hemming and hawing I decided to not install the defrost hoses and ports. I really would never use them. I will use the heater. I also have an access problem with the ducts on the driver side of the H/D unit. Ultimately, pilule I chose to use the duct openings on the passenger side to run air to the two heater ducts in my dash extension. The two openings on the driver side will be plugged off. I did that by cutting a short section of hose, thumb rolling, stapling and taping one end shut, and then installing the open end on the heater/defroster duct. The other two hoses were installed on the unit, run over the top of the unit between the dash and the firewall, then down through the opening I cut in the underdash filler panel and into the dash extension.

There really is not enough space above the H/D unit, but the hoses are flexible and I assumed the body would just compress them and not restrict flow. I tested this after the body was on and had very good air volume at both ducts. Next, I finally finished up the driver side footbox. The top panels needed to be fit and fastened. This took some time as there was lots of overlap, some areas where metal had to be cut away to fit and keeping all the impacted panels from moving was difficult.

I was told I should also install the elephant ears (front mud shields) before finalizing the body and door fit, so I drilled fastening holds and put bulb seal on as needed. I will have to finalize the position at a later time.
I also needed to remove the side pipes and move the brackets out of the way. Now I can get the body on.
With help from Pete and Julie, we place the body on the chassis – first over the front, down on the sides then back over the rear and the sides fully down and wrapped under the chassis.

This proved to be more difficult than I expected. Everywhere was a very tight fit. This was especially true around the cockpit and over the rear of the trunk floor and walls. When this was done, the whole body was about 6 inches to the rear. It took a lot of pulling, pushing bending and praying to slowly move the body into position. Ultimately we got it in place.

Next cam getting the quick jack bolts installed. As I looked at doing this, I was very confused by pictures in the manual showing the bolt heads both on the inside and the outside in different pictures. My notes I took when the car was shipped to me showed the rear bolts installed from the inside out. The fronts were just the opposite. However, it is not possible to install that way with the fuel tank in – so they would go out to in. Also, I could not get to the inner location of the top bolts on each side – they were under the trunk floor and I had already riveted the floor cover plates in. So, these came out by drilling out the rivets.

The other issue was getting access to the rear of the lower bolts – there was barely room for my fingers to hold the nut – but ultimately all were installed and tightened. I then moved to the front. Access was easier but it took a lot of final pushing and pulling to get the body openings and bolt brackets lined up. Finally got it done and the body was done.
I then started on fitting the doors. I hung them and make some initial marks to start grinding and sanding them to fit the openings.

I started on the passenger side. I got to where it fit in enough that it closed. At this point I decided to install the seat as I knew the high back seats came with a fit risk. Not surprisingly, I could not get the seat to fit in and still close the door or slide the seat back.

So, I needed to raise the seats higher .I had many thoughts on how to do this: larger angle iron with additional washers as additional shim; a whole stack of shim; straight metal pieces bolted to the existing brackets I made. I went to Lowe’s with a primary plan to get 3×3 angle iron (I currently have 2×2). This would gain me an inch of height. Then I would use washers and some spacers that came with the adjusting tracks to get the full 1 1/2″ height I wanted. Problem: there was no 3×3 angle iron now that I had seen before. However, as I looked at many options of steel, I found a square stock with pre-drilled openings every inch. This was a very sturdy item, and as luck would have it, it was 1 1/2″. A second piece of luck (finally) was that the spacings for the mounting was 11″ – so no new holes would be needed.

I took the steel home, cut it to length and re-installed the seat using longer bolts and screws I had gotten. Fit like a charm.

I removed the seat again, painted the new steel black, and now am confident the final seat install after paint will work great.
At this point, I also decided to add one more piece of work. there is an access hole in the trunk lid to allow wiring connections for the license plate light. I wanted to fill this and nothing comes with the kit to do this. So, I made a paper template to fit, cut a piece of sheet metal to match and rounded it to fit the curvature of the opening in the trunk lid.

Instead of painting it I opted for covering it with the same material I used on the dash. I pre-drilled some fastening holes, then glued the vinyl in place. After it dried, I wrapped it around to a tight fit and glued it on the back. I punched through the vinyl at the fastening holes, marked and drilled the opening in the lid, and screwed it in place to make sure it fit. This was also then removed to wait for final install after paint.

Then I got back to the passenger front door. I was pretty deliberate with sanding down the door perimeter, so I had to door on and off a lot. I also had to learn how to make fit adjustments with the bracketry. The door can be moved front or back and up and down a bit, so lots of movement is possible. In addition, the bracket could also be adjusted up and down and left and right where it attached to the chassis. So, movement options seemed limitless. I also made a strategic error early on by trying to make a small adjustment to the bracket position on the chassis with the door still mounted to the bracket. As soon as I loosened the bracket, the weight of the door shifted a large amount in multiple directions. And, I had no reference for where it had been. So, I spent hours slowly working the door back to an ok fit. Part of this was learning how each adjustment impacted the door position. In essence, any adjustment to improve fit in one area also impacted fit somewhere else – and not usually for the better! Bottom line, I slowly learned what to do, slowly ground the perimeter of the door to the the needed gaps, and after about 13 hours had a pretty good fit. There would be a bit of filler needed, but not bad. As I also found out later, I would still need to adjust the door more as I kept working to improve the overall look and fit of the door.

I then started on the driver door. With all my acquired skills I was able to complete this in only about 3 hours, plus some later adjustments. Of course, it was not without issues as well. On one occasion as I was removing the door, one of the nuts actually kept getting tighter as I tried to remove it. I spent a good twenty to thirty minutes working back and forth on the nut to finally get it off. The last 1/4″ of the stud was severely damaged and some of the threads were still stuck in the nut. Either the stud itself was flawed or something got into the nut while it was being removed. The nut had not been cross-threaded as I always hand tightened the nuts on first and then used a socket. At any rate, I cut off the damaged part of the stud and still had enough to use for fastening the door. No harm, just frustrations and time.

I then moved on to the trunk, thinking fitting up the trunk lid would be easy. Not so fast. Again, I had lots of adjusting options and these were not the same as the door. So I had to learn them all over. It was also more difficult to make small adjustments because the trunk lid had to be held open, accomplished with overhead bungees and the weight of the lid and design of the bracketry made it more difficult. My first few attempts were comical at best. I went from an ok fit all around to literally having the lid closed and being more than an inch above the opening.
I got a handle on this pretty quickly, and using pieces of tape I marked the brackets for starting positions. This make it easier to return to that position after I had sanded the perimeter down and re-installed the door, and also when I was adjusting the brackets. The lid finally got as good as I could get it – I will need to do a bit of filling on this as well. The one other thing I did was to test fit the trunk handle and latch pin assembly to make sure it worked. I wasn’t happy with some of the pre-drilled holes, but it worked. I may need to enlarge the handle fastening holes to get it horizontal, but that is a final installation effort.

I then moved on to the hood. I pulled the brackets and began to assemble them , but decided I wanted to paint them black. So, I did that and while they dried I moved on to the door latches.
I did the passenger door first. I attached the striker to the chassis with spacers so it fit into the opening in the side of the door.

I then spent a little time figuring out why the latch for the door was not going to work. I ultimately determined that the “LH” and “RH” designations were incorrect for this car. From there, I attached the latch to the striker, closed the door, and marked where it needed to fasten to the door. I drilled holes in the door and attached the latch, and it opened and closed great.

I moved to the driver side and had issues. The opening in the side of the door did not fit where the striker was, so I had to cut out a small piece of metal. I then followed the same procedure on this door and fastened the latch to the door. It closed ok, but the striker at times struck the latch – the striker was not centered in the latch opening as the passenger side was. Thais also caused the door to lift slightly when closed, getting it mis-aligned with the body. I ended up filing the striker mounting bracket so I could change the striker position, and make a small door bracket adjustment. This got me where I needed and now door fit and operation is good.

So now I moved back to the hood. I assembled the bracketry and went to install it on the vehicle. What I saw was very limited access to the fastening points. I checked the forum and found out a lot of this would need to be done from under the car. So I put the car on jackstands and got to work. I had done some initial work on the hood gaps, so it fit in the opening ok. I attached the hood bracket to the hood, and left all the fasteners loose. However, since the fasteners holding the hood to the opening bracket were loose, after I had tightened the bracket to the frame, then opened the hood and tightened the hood to the bracket, the hood position shifted. So, I loosened all the frame bracket fasteners. I also started putting cardboard shim under the hood to get the height correct versus the body.

I expected all of this to be easy, but it is not proving that way. Now that all the fasteners are in place, I can tighten and loosen pretty easily. Getting them installed was a real pain. Thankfully I have long arms and fingers!
