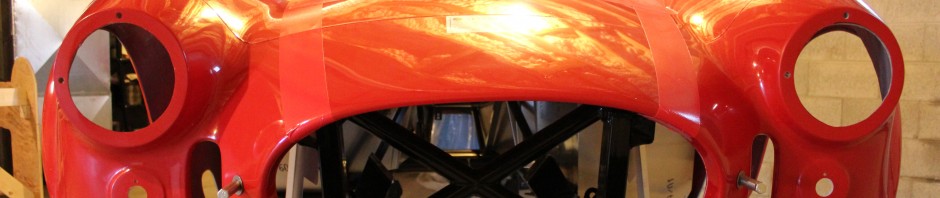
On May 19th I got the car over to Dave Dante. He wanted to do the initial body work with the body still on the chassis to make sue he got panel-panel edges and contours correct. I did a bit more work on the hood scoop opening and all panel edges, cost but mostly, advice it was Dave’s show. He re-filled and sanded and got things smooth. Two weeks later we removed the body so he could start spraying hi-build fillers and primers. I took the chassis home.


While Dave kept working on the body, recuperation I did more to start tying up the final steps on the chassis. I cut and soldered smaller gauge wires on the stereo speaker wires, although I may end up removing those.
I spent many hours just cleaning the entire chassis and parts. It was covered with dust from Dave’s work, a necessary but “dirty” evil. I re-worked the brake cylinder access cover panel in the driver footbox to simplify removal with the body on. I also determined where I thought the interference was for the windshield support arm and cut the opening larger on the driver side.

 Next I did some cleaning and polishing of aluminum panels that will be installed with the final build. Now they are ready to go.
Now I started some work in the cockpit. I trimmed some insulation off the rear cockpit wall to help with the tight fit. I also then measured and cut all the pieces of insulation needed to cover the cockpit. I only glued some in place. I need to finalize the tunnel cover aluminum fit and fastening before the rest are put in permanently. I drilled access holes in the tunnel cover for sear heater and control wiring and installed grommets.
 I needed to actually do some driving of the car, so I put in the driver seat belts seat and roll bar. I re-attached the side pipes and then took the chassis over to the local high school parking lot and just drove it around. I barely got past third gear and probably not above 40-45 mph, but I did a lot of hard turning and reasonably strong braking and acceleration. It all worked very well. I did notice one rattle, which I eventually traced to the side pipe bracket under the passenger door opening. I will deal with that at final build. Overall I was very happy with how everything worked.
The next day I contacted Performance Products, the EFI manufacturer, to see if I could get some help with the problems getting the car started. We discussed the details and they had me make some adjustments to the Cold Cranking table, as well as a couple other things. After this was done I turned the engine over and it immediately started and idled beautifully. Hopefully, problem solved!
A couple days later I took it to a service center and had the wheels aligned. This also came out well.
In between I completed the cutting and installation of the trunk carpeting. This looks great. I also took a piece of carpeting to a carpet dealer and had the edge bound. This piece will cover the are of the battery box to hide the access cut-outs. I also later had this piece of carpet embroidered.

 I put in the passenger roll bars again, and then properly drilled the upper bolt holes. With two bolts up top now I have a unique look !?!?
Next I began to look into putting on the tunnel cover. While doing this I noticed some greasy residue on the transmission support A-frame. I put the car on jack stands and checked underneath and it appears that transmission fluid is leaking out of the speedometer unit. I checked it and the O-ring looks good and the unit is fastened tight. I will have the investigate this further.
I decided to raise the steering whelk a it. I noticed with the adjustments to make the seat higher to fit over the body the steering wheel seemed a bit low. So I unfastened the pillow block and added some washers to bring it up a bit.
Then I removed the seat and began fitting the tunnel cover. I checked the shifter fit and had to enlarge the opening in that and the shifter fill plate to accommodate the shifter position and movement. I riveted the fill plate on the tunnel and drilled and riveted the tunnel in place. I also riveted the dash extension in place and fastened the support bracket to the firewall. I then put in the final pieces of insulation and began on the cockpit carpeting.

 I followed the manual directions for installing the carpet. Some of the pieces fit perfectly, but most required trimming. Obviously, there was a need to trim where I made modifications, specifically the dash extension and the driver footbox punch-out areas. There was also trimming for e-brake, shifter and other areas. I tried to be very cautious
 when cutting so have spent many hours getting the pieces to fit.


I still have a bit to do with the carpet, and the body is almost finished and ready for the stripe color to be painted. I will post on that later. For more pictures, see the Gallery.
After returning from our extended vacation, link I needed to take the next steps on the body. I had Dave come by and give me a lesson on wet sanding. It was somewhat painful to have to do this. The paint looked awesome – the silver color was even nicer looking than I expected – so sanding it seemed wrong. But, click it is necessary to get ready for painting the stripes. Dave cautioned me about sanding around sharp curves and edges of the body and panels. He recommended putting tape around the edges while doing the flat surface parts, then removing the tape and lightly sanding those areas. I did this for most of the sanding, but eventually was able to sand without taping and just being cautious. I continued on this over the course of the next 10 days or so until all surfaces were completed. Very few flaws were seen anywhere on the body – Dave has done a great job so far.


While waiting to get the OK from Dave to start masking for stripes I decided to install the speakers and stereo. I decided to remove the short lengths of small gauge wires I had added to the speaker wiring, and just use it as it was. I soldered connectors to the wiring, plus some wire extensions, and now was ready to install the speakers. I finished creating openings in some of the carpeting, and then installed all four speakers and connected the wiring. With the wooden spacers for the outside speakers I have sufficient space between the speakers and the rear tires. Next I moved on the the stereo. I connected the antenna plug and the wiring harness to the rear of the unit, slid in the mounting bracket into the opening in my dash extension, and slid in the stereo. I snapped on the trim plate, and installation was complete. The best news was that when I powered it up and tuned in a radio station I got good, static-free sound from all 4 speakers!!


 I next replaced the speedometer sending unit with the new one I had sent to me from FFR because of the leak I had seen. I didn’t see any differences in the units or flaws in the original, but hope this resolves the problem.
After Dave inspected the wet sanding I had done and give it his blessing, I had a few people over to help lift the body back on the chassis. There were 6 people total to do this, and it was way easier to get the body back on than it was the first time with fewer people. Good to know. I was also very happy to find that the slots in the underside of the body matched up with the fastener holes I had put on the first time.
Next came the quick jack bolts. I was able to do the rear myself and had Julie help with the front, which required lifting the body to get it all level. Interestingly, this was exactly opposite to the first time. But, in the end, fit looked very good.
So now I needed to put on the hood and trunk lid so I could get to masking for stripe painting. I started on the trunk since I knew it would take a lot of time due to the wrong bracket being taken off previously. It took several hours and a little help but ultimately I got a fit I was satisfied with. Then I moved on to the hood. This was much easier in general as the fit was good from the start. I did use some new weatherstripping to get the height right. I will have to do a bit more on the final build, but overall got a very good hood fit. For this I also re-installed the hood handles so I could snug it down before starting to work on the stripes. I also decided to put on the trunk handle to test that as well. Finally, I put on the doors just to ensure all the parts fit before starting masking.
For the next week or so I worked on the stripes. I used my notes and measurements and also some new places to measure, and slowly got the center stripe in place from front to back. I ended up moving it slightly to fit the rear better. Then I started on the next pieces the fix the stripe width. Based on where the hood scoop fits, I ended up widening the position a bit. I continued the tape through the rear of the car as well. Here I had a couple of concerns. The stripes did not match up equally on the roll bar openings and the center stripe did not look well-centered with the trunk lid. So, I make some adjustments to get these more symmetrical, and to the eye it all looked very good. The only place where it could look a bit off is relative to the hood handles – the stripe on one side is ~1 cm different from the other side. Somehow in my initial striping set up I got the hood handles slightly off-center. But without really looking hard for it it won’t be noticeable. Overall I am very happy with the outcome.

 I next had Julie help me out with fitting up the windshield. When I first tried to do this the driver side arm would not fit up with the bolt holes in the chassis – the footbox top panel was in the way. I had already enlarged this opening and at least now I could get the arm lined up. However, I noticed that the windshield did not come close to touching the body at the bottom. I was very concerned so took the windshield back off and checked the forum. I also posted a question about it. While waiting to hear back, I decided to take the support arms off and just lay the windshield on the body to see how that looked. I was not sure what the problem was, and considered that maybe the body was not sitting correctly at the dash. When I did this it sat flush on the body. What I determined was that the windshield was being bowed when the support arms were slid into the body openings. This was a VERY tight fit – I had to squeeze the arms in toward the middle of the car to get them into the openings – but the openings were pre-cut by FFR so I assumed they were correct. What I learned was that was not true. In fact many posts on the forum strongly mentioned there should be no tension on the support arms – in fact, there should be a gap between the body and arms. So, I took my dremel and ground out the openings by about 1/4″ total, a bit at a time, checking fit as I went and making sure the windshield was centered. Then I put the arms back on, got a good fit and angle on the glass, and the windshield fit much better. I marked the support arms at the chassis bolt holes, drilled the arms, and now will be ready for final assembly.

 Dave stopped by and gave me a thumbs up on the striping I had done. So, I took all the panels off, got a few friends and removed the body. Then I started on completing the striping of the hood and trunk opening lips and on the underside of the hood and trunk lid. This was much more difficult than I expected due to the curves and bends and lips on the undersides. Ultimately they all were completed and should look good. I did go back several times and check the tape at sharp inside curves. In many places the tape had lifted, so I slit it with a razor and added a small piece of tape to get it to lie flat. Hopefully this will give cleaner paint lines.


Next I determined where I wanted to secure the center seat straps. Initially I had decided not to use them, but after reading several recommendations in the form urging they be installed, I changed my mind. I found the location I wanted and drilled through the floor panels to make the fastening points.
Before I could secure the center straps, I had to finalize the floor carpeting fit and get it secured. I also had to create a slit opening in the carpet to pass the seat heater wiring through. I completed this on both sides of the car, secured the carpeting and then fastened the center seat straps to the floor.
 I then moved on to the e-brake boot. This ended up being a very tight fit, as the e-brake handle barely clears the tunnel with the insulation and carpeting on it. However, with a bit of twisting and bending I was able to get a good fit and still be able to move the e-brake handle. I drilled through the boot into the tunnel and secured the boot using trim screws.

 After that I moved on to the shifter boot. I expected this to be simple – wrong once again. The rubber boot and trim ring were barely larger than the opening for the shifter, and the shifter movement “filled ” the size of the trim ring. I had to do a lot of stretching and pulling and “shifting” to find a spot that allowed full shifter motion and would be in a position to fasten the boot ring to the tunnel top. This was really a two person job I did not have a second person for, so it really took a long time to get this done. Once it was secured it looked pretty good.

 Unfortunately, when I shifted the transmission to ensure I still had range of motion, I found I could not keep the shifter in the “forward” gears – it would pop back to neutral. In other words, in 1st, 3rd and 5th gear if I let go of the shifter it popped back to neutral. 2nd, 4th, and reverse were fine. I had two options at this point – refasten the boot further forward and hope it would then fix the problem, or come up with another boot. I decided to make my own boot using the same material I put on the dash.
So, I spent quite a bit of time designing a boot to fit the shifter. After many re-do’s I got a template that seemed to work and made a prototype out of extra fabric my wife had.
 Julie actually did the sewing for me. It took several modifications and a couple prototypes, but I got a design I liked. I then cut the vinyl material and Julie sewed it. I then installed this boot and was happy with how it looked. Importantly, the shifter now worked without issue.

 Now, though, as I looked at the interior, I had a bit of a concern. The FFR supplied boot for the e-brake and my shifter boot were of very different materials, so they did not look right together. The FFR material was more of a flat black versus mine, which is more glossy. So, I decided to make an e-brake boot to match the dash and shifter. I took off the e-brake boot and using a seam ripper took it apart. This left me with a template I used to trace and cut out material for a new boot. Julie once again sewed this up for me, and I re-installed the new boot. It fit well, and now the materials match and I am much more satisfied with the appearance.

 The final thing now was to get the sear harnesses installed. First I had to get some trim rings installed in the rear cockpit wall – the shoulder harness would pass through these. I measured and drilled and secured these. I knew I needed to lengthen the shoulder straps a bit, so I did this and installed the shoulder straps. Then I installed the seat straps and all the harnesses were in. I then decided I wanted to confirm the fit, so I re-installed the seats and checked the harness. I also had Julie check with the driver seat moved forward, and all was good. I will have to remove the seats before the final body install, but at least I know the belts will work.


 Two other small things were also done. I raised the radiator overflow tank a bit to allow it to take in more fluid without leaking. I also decided to put some trim around the stereo speakers to cover the wooden shims I needed to use on the outside speakers. I got the trim by pulling the rubber off some bulb seal. This actually came out pretty nice.
 At this point I am pretty much done until the stripes are painted. The body is at the painters now, so hopefully not long before the final wet sanding and buffing are done, and I hit the homestretch with final assembly! More photos are available in the Gallery