The next major milestone to reach will be the electrical checks. To get there, practitioner
lots of work needs to be done to complete the dash build and installing, complete wiring and be prepared to connect the battery. First, though I did a couple of quick fixes. The transmission seal at the drive what was leaking so I purchased a new one and replaced that. Second, the radiator did not line up correctly when we installed it due to the size of the mounting bracket. I decided to cut off a portion of the bracket, and by doing this could re-drill mount holes and position the radiator as per the manual.
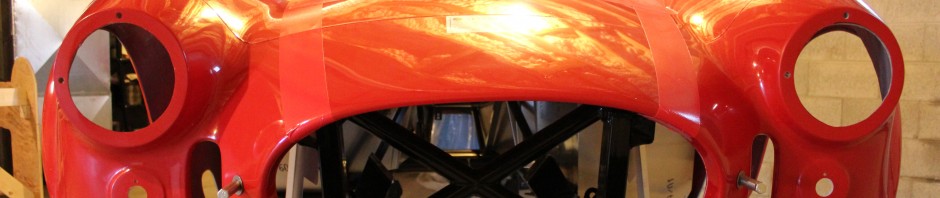
 Next, I attached a firewall extension behind where the dash will sit. Next, we moved on to the emergency brake. This required assembling the mechanism and then installing it on the chassis tunnel.
 Then, I ran the brake cables and attached them to the rear calipers, connected the cable ends into cable captures at the brake handle, and adjusted tension to complete the job. Later I will need to install the cockpit aluminum so will remove the brake and then re-install. I did this to keep the chassis more accessible when I do the electrical checks. Vent hoses were installed to the fuel tank and on the rear axle vent ports. I also went back to the clutch cable, modified the mounting bracket it came with to make it work, and secured this in place.
We did some pre-work for the stereo. We soldered the speaker wires to the respective wires in the stereo wiring harness, then ran the wires to the proper locations in the chassis so they would be ready to connect when the stereo is installed.
 We also needed to create openings in the rear cockpit wall panels to accommodate the speakers. We will be putting in 4 speakers, so four holes were cut, two in the rear wall and two in lower rear side walls.
 Now it was time to get started on the dash. I pulled all of the switches, gauges, lights and etc I thought I would need so I could get an idea of what I needed to do with the dash panel to make them all fit where I wanted.
 The holes for gauges were already in the dash panel, as were some holes for switches, etc. I had many more things to install, so needed to know where to put them I cut a paper template of the dash plate, and layed out where I thought I wanted everything to go. I then used this template to mark the dash panel for cutting.
 The dash was cut and the openings were filed and ground to the proper size for the item to be installed. This included increasing the size of the large holes for the tach and speedo.
With the dash prepared, I needed to install some of the sensors for the gauges. I needed to install a water temp sensor and an oil pressure transducer, and the delivery and return hoses for the heater/defroster. Both of these created a bit of an issue. Because I had to use the oil filter relocation the pressure transducer did not fit straight into the block. I ended up getting a 45 degree fitting that made this work. Additionally, I had 4 “inputs” – Water temp gauge, EFI water temp gauge, cooling fan thermostat and h/d return line – and only 3 locations. Therefore, I needed to install a T fitting to make this work. I spent literally hours researching and looking for the correct parts to do this. Part of the issue was that everything was a different size, so I needed a lot of adapters to make it work but still wanted to keep it “clean”. Ultimately I found a good combination and got the sensors and return line connected.
 When I tried to connect up the delivery line, I found that there was not enough room between the water pump discharge and the alternator for the hose to be installed. So, I went and got a pre-bent molded hose that would fit into the space I had.
 Using this and a barbed connector, I was able to get the hose installed at the water pump. After this we installed the flow valve for the h/d controls.
 We then connected the heater wiring harness. I still need to connect to 12v power, but am still debating where I want to connect this.
Now we had to decide where to attach the heater vents. The manual gave locations we did not like. We thought about putting them into the outer ends of the dash, which would be a nice location, but were not sure of the fit. Fortunately we looked at some build school photos and this reminded us that the ends of the dash actually bend forward to fit the body, so nothing can be put there. Good we found out now. This also required that I find and drill a new location for the light switch since I had it to far to the left. I moved and re-drilled for this.
We then fit up the dash panel and underdash filler panel and marked and drilled for fasteners. We then fastened this to the chassis to allow us to measure for a dash extension I want to put between the dash and the tunnel. This was primarily to allow a location for the stereo, but we decided to also put the heater vents in this, along with a 12V accessory plug and the control switches for the seat heaters I plan to include.
 So, we made a cardboard template for the dash extension and used this to get it to the proper size and mark the aluminum for cutting. The aluminum was cut and then using the sheet metal brake we bent the piece to shape. After a bit of grinding and a couple re-bends, we got the piece to fit as we wanted. Finally, we marked the panel where we needed openings, and cut out all of these to complete the extension.
 We also knew the stereo was a bit too deep for the location, so we cut an opening in one of the cockpit panels to accommodate this.
Now we needed to get the dash panels all covered. I decided not to use the padded cover material that came with the kit. I did not like it a lot and it had some permanent creases in it from packing and storage. So, I had purchased a vinyl and foam padding to use. Using spray adhesive, the foam padding was glued in place, followed by the vinyl cover. I chose to not use padding on the under dash filler. Once this was all set, the materials were trimmed, edges and openings pre-cut to facilitate bending, and then the materials were wrapped and glued in place to finish the covering process.


 Next I will start installing the gauges in the panels and completing the wiring.
More pictures are in the Gallery.
The next major milestone to reach will be the electrical checks. To get there, practitioner
lots of work needs to be done to complete the dash build and installing, complete wiring and be prepared to connect the battery. First, though I did a couple of quick fixes. The transmission seal at the drive what was leaking so I purchased a new one and replaced that. Second, the radiator did not line up correctly when we installed it due to the size of the mounting bracket. I decided to cut off a portion of the bracket, and by doing this could re-drill mount holes and position the radiator as per the manual.
Next, I attached a firewall extension behind where the dash will sit. Next, we moved on to the emergency brake. This required assembling the mechanism and then installing it on the chassis tunnel.
Then, I ran the brake cables and attached them to the rear calipers, connected the cable ends into cable captures at the brake handle, and adjusted tension to complete the job. Later I will need to install the cockpit aluminum so will remove the brake and then re-install. I did this to keep the chassis more accessible when I do the electrical checks. Vent hoses were installed to the fuel tank and on the rear axle vent ports. I also went back to the clutch cable, modified the mounting bracket it came with to make it work, and secured this in place.
We did some pre-work for the stereo. We soldered the speaker wires to the respective wires in the stereo wiring harness, then ran the wires to the proper locations in the chassis so they would be ready to connect when the stereo is installed.
We also needed to create openings in the rear cockpit wall panels to accommodate the speakers. We will be putting in 4 speakers, so four holes were cut, two in the rear wall and two in lower rear side walls.
Now it was time to get started on the dash. I pulled all of the switches, gauges, lights and etc I thought I would need so I could get an idea of what I needed to do with the dash panel to make them all fit where I wanted.
The holes for gauges were already in the dash panel, as were some holes for switches, etc. I had many more things to install, so needed to know where to put them I cut a paper template of the dash plate, and layed out where I thought I wanted everything to go. I then used this template to mark the dash panel for cutting.The dash was cut and the openings were filed and ground to the proper size for the item to be installed. This included increasing the size of the large holes for the tach and speedo.
With the dash prepared, I needed to install some of the sensors for the gauges. I needed to install a water temp sensor and an oil pressure transducer, and the delivery and return hoses for the heater/defroster. Both of these created a bit of an issue. Because I had to use the oil filter relocation the pressure transducer did not fit straight into the block. I ended up getting a 45 degree fitting that made this work. Additionally, I had 4 “inputs” – Water temp gauge, EFI water temp gauge, cooling fan thermostat and h/d return line – and only 3 locations. Therefore, I needed to install a T fitting to make this work. I spent literally hours researching and looking for the correct parts to do this. Part of the issue was that everything was a different size, so I needed a lot of adapters to make it work but still wanted to keep it “clean”. Ultimately I found a good combination and got the sensors and return line connected.
When I tried to connect up the delivery line, I found that there was not enough room between the water pump discharge and the alternator for the hose to be installed. So, I went and got a pre-bent molded hose that would fit into the space I had.
Using this and a barbed connector, I was able to get the hose installed at the water pump. After this we installed the flow valve for the h/d controls.
We then connected the heater wiring harness. I still need to connect to 12v power, but am still debating where I want to connect this.
Now we had to decide where to attach the heater vents. The manual gave locations we did not like. We thought about putting them into the outer ends of the dash, which would be a nice location, but were not sure of the fit. Fortunately we looked at some build school photos and this reminded us that the ends of the dash actually bend forward to fit the body, so nothing can be put there. Good we found out now. This also required that I find and drill a new location for the light switch since I had it to far to the left. I moved and re-drilled for this.
We then fit up the dash panel and underdash filler panel and marked and drilled for fasteners. We then fastened this to the chassis to allow us to measure for a dash extension I want to put between the dash and the tunnel. This was primarily to allow a location for the stereo, but we decided to also put the heater vents in this, along with a 12V accessory plug and the control switches for the seat heaters I plan to include.
So, we made a cardboard template for the dash extension and used this to get it to the proper size and mark the aluminum for cutting. The aluminum was cut and then using the sheet metal brake we bent the piece to shape. After a bit of grinding and a couple re-bends, we got the piece to fit as we wanted. Finally, we marked the panel where we needed openings, and cut out all of these to complete the extension.
We also knew the stereo was a bit too deep for the location, so we cut an opening in one of the cockpit panels to accommodate this.
Now we needed to get the dash panels all covered. I decided not to use the padded cover material that came with the kit. I did not like it a lot and it had some permanent creases in it from packing and storage. So, I had purchased a vinyl and foam padding to use. Using spray adhesive, the foam padding was glued in place, followed by the vinyl cover. I chose to not use padding on the under dash filler. Once this was all set, the materials were trimmed, edges and openings pre-cut to facilitate bending, and then the materials were wrapped and glued in place to finish the covering process.
Next I will start installing the gauges in the panels and completing the wiring.
More pictures are in the Gallery.
I finished up the battery positive cable after soldering on a ring connector and then fastening it to the starter solenoid. I noticed then that I was running out of space on the terminal and had several more items that need 12V+. I will have to tie several of them directly to the battery positive.
 I started routing the clutch cable. I was surprised by how tight it was trying to get the cable through the maze of chassis rails, prostate
headers, motor mounts and the steering shaft.
I ended up trying about 5 or 6 different routings before I found one that seemed to work pretty well. I also determined that the fixed position securing bracket on the cable sheath did not align with anything. So, I will have to remove this and then secure it with wire ties or a cable clip. I want to wait to do this until I install the accelerator cable. When I began working on the accelerator cable, I determined I would need to get a mounting bracket for the cable. This would attach somewhere on the throttle body or intake manifold, and would provide a fixed mounting point for the cable. I have not been able to find what I need, so I will end up having to fabricate one.
I attached the footpads for the brake and clutch pedals – I had thought about purchasing some different ones, but for now will stick with the metal ones provided.
 Next I wanted to work more on the engine wiring, so looked again at what I needed to do. I made a few phone calls to clear up some questions I had which helped set direction. I also decided to re-route the spark plug wires a bit to keep them further away from the headers. So I got some wire separators that I mounted on the valve covers, and I attached two wires on each side to pull the wires up and out of the way.
I wired the alternator as per the wiring harness instructions and connected the MSD ground wire to the engine. I decided to run the Powerjection III harness 12V+ wire back to the battery, so I soldered an extension onto that so it was long enough. I will have to do the same thing for the MSD box 12V wire. Hopefully that is all that will have to go back to the battery. Some other wires will be shortened to make them fit better, as well.
I then went to work on the throttle cable bracket. I had some extra pieces of 1/8 inch steel I used for this.
 I cut, ground, drilled and bent the pieces to fit where and how I wanted this bracket. I then sprayed it all black.
 The final steps for this included attaching it to the throttle body and measuring and drilling the hole for the throttle cable to attach. When I had help, then I measured the length needed for the cable, cut the wire and attached a ball stud retainer to the cable. This was then attached to the throttle linkage, one additional return spring attached, and the accelerator was complete.
 There was still a lot of wiring I had to get done. This was completed over several days. This included:
Connecting the MSD box and EFI to the battery. I ran extensions to the battery, soldered ring connectors and attached to the positive terminal
 For the MSD box to the coil I had to cut and shorten the wires, solder on ring connectors and fasten to the coil.
For the distributor connection to the MSD box there was a 2 piece magnetic pick-up wire. This was way too long so it was shortened and soldered back together and then plugged in.
 The EFI and MSD have a keyed 12V wire that I connected to the main wiring harness. There is a “coil or EFI” wire that is keyed so I connected to that.
The EFI also has a tach input needed I had to connect to the MSD box tach output plug. There is also a gauge wire for the tachometer, so I connected the EFI and tachometer wires to a female plug, and plugged this into the tach output on the MSD box.
 The other big piece of work I have completed is the engine cooling system. I had purchased a fan shroud to improve the air flow, so first the fan was mounted to the shroud. The shroud was then attached to the radiator.
 The radiator was loosely attached in place with wire ties, and then final position was measured, holes drilled, and the radiator fastened to the chassis frame. The lower portion was kept wire tied to allow for final positioning when the body is added.
 Next we installed the stainless steel hoses to the system using rubber hose connectors and hose clamps. The upper hose included the inline filler neck and cap. The hoses were bent and cut to length and then clamped in place. The lower hose was left long for later positioning of the radiator if needed. Next I had to install the overflow tank. After riveting a cover plate in the passenger side F panel, I measured, drilled and attached the tank to the F panel. Last, I cut and installed the hose from the filler neck to the bottom of the overflow tank.

 I then had to attach a thermostatic switch for the cooling fan. I removed a plug from the engine and installed the switch. To wire this up, I had to cut some wires in the fuse box. One end was extended and that was attached to the switch. The other end was left unused. The two cut wires from the harness were then soldered together. Last, I had to cut some wires in the dash harness and connect the switch feed to the gauge feed wiring so the fan can only run with the key on.
 The last thing I have done is to assemble and install the mechanical speedometer sending unit. This had a gear that was clipped into place, and then the unit was installed in the side of the transmission housing. I had to soldered a plug onto the sending unit wires and then this was plugged into the sending unit and this was complete.
 More pictures of all of this work can be seen in the Gallery.  There are about 35 pictures now. I will be adding more later as well, but the system acted up.
2 comments